5 Simple tricks to Dark Brows definitely give you that extra 'Oomph' Factor
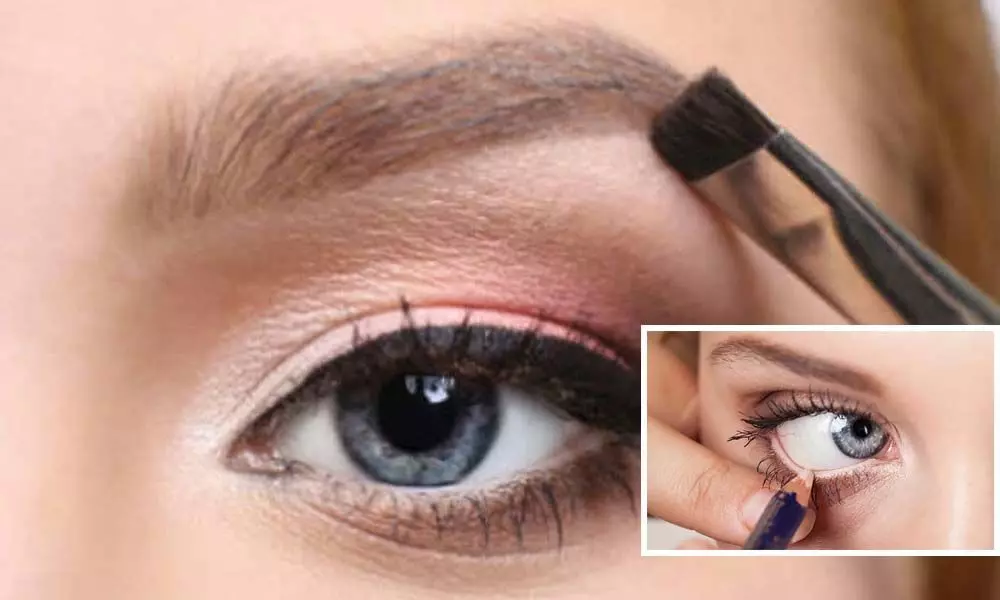
Dark and heavy eyebrows are all the rage these days and they automatically enhance your look.
Dark and heavy eyebrows are all the rage these days and they automatically enhance your look. Whether you're going for a toned-down everyday look or an intense bold look, darks brows definitely give you that extra 'oomph' factor. I absolutely LOVE thick/dark/messy heavy eyebrows and although I have Desi genes to thank for already having dark eyebrows, the heavier the better, right?
Thanks to our makeup haven producers, anyone who has and hasn't been blessed with heavy brows can get brow kits and fill them in. A not-so-quick trip to Sephora can land you in the midst of a brow-crisis, especially if you don't want to break the bank.
But this DIY is easy on your wallet, and will absolutely change your brow game, at a minimal cost.
Here's what you're going to need:
1. Vaseline
2. A matte dark brown/black eyeshadow
This really depends on your eyebrow and hair colour.
I prefer ashy/taupe browns for my brows and what I've noticed is neutral dark browns work best with people who have dark hair and warmer browns work better for redheads. Something like the shade on the extreme right from this ELF palette would be perfect!
If you have a brow kit, then there's nothing better than that, but, since this is a DIY, a dark eyeshadow works fine with Vaseline.
Side note: two of my personal favourites are the Benefit Brow Kit (Ka-Brow) or the ELF one if you're looking for a more affordable version. The Benefit changed my brow game completely, and I love love LOVE IT!!
3. An angled brush
You can use a regular angled brush or a thicker one. The only difference is a regular one gives a sleeker look, whereas you need to be a bit more careful with a thicker brush because it can give you a messier look.
Optional: Eyelash wand
You need this brush to even out the eyebrow hair, and give it a more natural look. It also shapes them up nicely.
On to the method now:
Step 1: Comb out the brows using the eyelash wand
This helps get them in shape and ensures they're not all over the place.
Step 2: Take your angled brush and dip it in the Vaseline
Make sure the brush is clean before you do this.
Step 3: Dab the eyeshadow on the brush
Now dab the angled brush with vaseline into the eyeshadow. I use a VS darker brown for my brows, but really the shade you pick is up to you. Experiment with a few shades so you can figure out which shade works best for you. Don't experiment right before a major event. Makeup is art, and art takes time and practice. Always safer to go with something you've tried, but, that's just my 2 cents.
Step 4: Shape your brows
Smudge the colour on your hand to test it first.
Next, shape the bottom and top of your brows, almost like you're drawing an outline for the shape you want them in. Using the angled brush, make small strokes replicating the direction of your brow hair, and fill them out. Start from the outer corners and build it up to the start of the brows.
Step 5: Fill them in
This is the fun part because you're essentially colouring within the outline you did in the previous step.
This lasts for a good few hours.
PRO TIP: use the eyelash wand to brush the brows at the end and to make them look more natural.
Bonus tip: To make your eyes pop, use a white or slightly golden but shimmery eyeshadow for the inner corner of your eyes.
Use a highlighter below the arch of your brow, where your brow bone is, to set the look.
This method is a great alternative to buying an actual brow kit. But the only downside is, it won't last as long in comparison to a brow shade. You will have to touch up or redo your brows, repeating the same process after a couple of hours.
If you're okay with that, though, then definitely try it out.
Slay on! You're ready to take on the world with brows to kill for.

